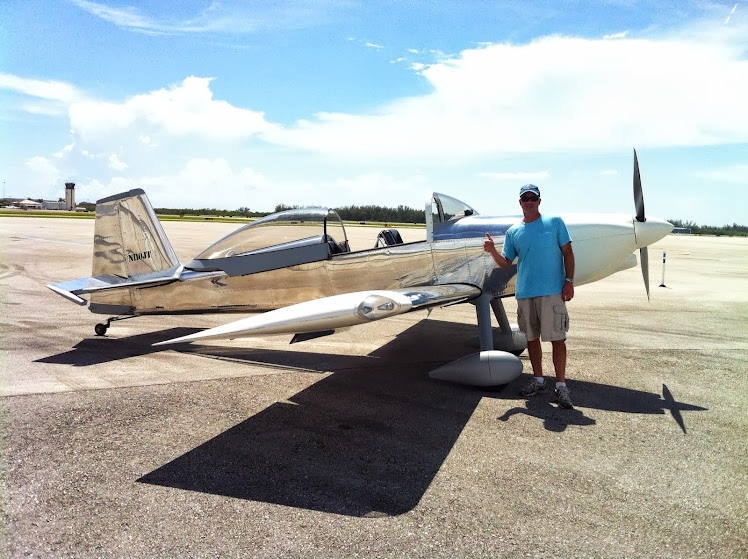
The first start went well! The only minor issue was the mixture being set a little rich and the idle rpm being set a little too low. We made a few adjustments and everything was ALL GOOD! Special Thanks to Jeff Johnson, Udo Reif, and Mike DiMarino for their expertise. Thanks to Chris Fendley, Rob Wilson, Tracey Cooper, and Clint Ivester for the pictures and video.
Welcome to JT's RV8 Aircraft Factory -N110JT
The following is a brief and simple description of my construction of a Vans RV8 aircraft. Scroll down to the labels for a complete log of each section. Click on the pictures for a close up view. Click the top to return home. Enjoy! -JT *This blog is for entertainment purposes only* *DREAM IT, BUILD IT, FLY IT*
Monday, March 05, 2012
The First Start!
Labels:
Finishing
Thursday, March 01, 2012
It's Time For The Spark Plugs!
Now, It's getting Exciting! In addition to the plane nearing completion, I've started flying a 200hp CS Cessna 172 "Texas Taildragger". This should prepare me for my up and coming RV transition training.
Thanks Jeff!

The spark plugs were torqued to 35.0 ft lbs.
All plugs gapped to .018
I'm going to add an adel clamp to secure the wires below the baffle top edge.
Labels:
Finishing
Wednesday, February 22, 2012
Checking the Fuel System

*Special Thanks to RVer Jeff Johnson for helping me through this phase of the project!
Jeff helped me trouble shoot a leaky fuel line. Turns out, my left tank to fuel selector line was a hair short. As a result, a AN sleeve pulled the flar through ,ruining the fit and drawing air into the line. No wet leak was seen, just a faint fuel smell! This was detected by constant air bubbles in the clear fuel test line. We elected to make a new 3/8 line using 5052 alum tubing. This is much better than the cheap crap Vans supplies you with in the kit.
Next, we made sure the main line from the firewall to the induction servo was clear. Final testing involved the servo to injector spider line. I'm happy to report, All is Good! - Ready for the First Start!
![]() |
| Test Line returning fuel to the Left Tank. Jumper cables were used to ground the plane to the hangar, via the exhaust pipes. |
Intial fuel testing was done with 10 gals of avgas. We ran some 3/8 tubing ,with a clear auto fuel filter, from the firewall fitting back to the tanks. Using the electric back up pump, we checked the Left and Right Systems, making sure there were No leaks, No trash, and No air coming in.
*The plane, truck, and fuel hose were all grounded.

*Special Thanks to RVer Jeff Johnson for helping me through this phase of the project!
Jeff helped me trouble shoot a leaky fuel line. Turns out, my left tank to fuel selector line was a hair short. As a result, a AN sleeve pulled the flar through ,ruining the fit and drawing air into the line. No wet leak was seen, just a faint fuel smell! This was detected by constant air bubbles in the clear fuel test line. We elected to make a new 3/8 line using 5052 alum tubing. This is much better than the cheap crap Vans supplies you with in the kit.
Next, we made sure the main line from the firewall to the induction servo was clear. Final testing involved the servo to injector spider line. I'm happy to report, All is Good! - Ready for the First Start!
Sunday, February 12, 2012
The Weight and Balance Numbers Are In!
Set Up: RV8 Weighed in Level Flight Attitude with the Canopy closed.
*Aerosport /ECI Titan ,Parallel Valve, IO-375 M1, 195+HP Motor with Oil.
*Hartzell Blended Airfoil CS Prop with a 2 1/2" Saber Prop Extension.
*Vans Landing Gear with Unfinished Wheel Pants and Fairings.
*Sam James Painted Cowl.
*Odyssey Battery on the firewall.
*Full Leather Interior and Carpet.
*Removeable 5 lb Fire Extinguisher mounted to Aft Baggage floor.(Mainly used as solo ballast)
*Approx. 3-5lb ELT mounted in the center, rear half of the fuselage.
*Epoxy Primer on the inside of all components, interior has also been painted.
EMPTY AIRCRAFT
Right Main Wheel-562 *Vans Datum 70" Forward of the leading Edge
Left Main Wheel -564 *CG Range (FWD-78.70-86.82 AFT of Datum)
Tail Wheel- 47.4 *Utility Gross-1800(utility cat +4.4/-1.75G)
* Aerobatic Gross-1600(+6/-3.0G) Va-135 range
Unofficial Total Empty Weight -1173.4
Labels:
Finishing
Tuesday, January 17, 2012
Tuesday, January 10, 2012
Strobe and Position Lights
One of the cool features of the Aeroleds is that the strobes can be synced by simply connecting three wires.
| The AeroLed Suntail is a combo strobe/ nav light that can be operated independently. |
Labels:
Finishing
Sunday, January 08, 2012
Wednesday, January 04, 2012
Fuel System Complete!
| Left Fuel Tank Vent |
| Left Fuselage to Tank Connections |
Forming and fitting the fuel lines turned out to be a bigger challenge than expected! The old lines interfered with the spar nuts, so I pulled them out and fabricated new ones. This was a real pain with all of the other pieces,parts, and wires already in the plane. *Special Thanks to Jeff Johnson for lending me a hand.
| Right Fuselage to Tank Connections |
Labels:
Finishing
Friday, December 30, 2011
Fuel Tank Bracket Secured
The plans have you cut a 1/4" slot from the end of the fuel tank bracket to the bolt hole(zoom in pic to view slot). I did this, just prior to installing the wing, with an air saw. After wing installation, I secured the bracket with a drilled head AN4 bolt, 970-4 washer, and safety wire. *In the event of an accident, the slot allows the fuel tank to pry away from the fuselage.
Labels:
Finishing
Wednesday, December 28, 2011
Final Wing Installation!
The Wing Install is Complete! Yes, It was a real pain, but doable with the right tools. It took us a total of 5 hrs to complete. *Special Thanks to Chris Fendley, Udo Reif, and Jeff Johnson.
It's finally an airplane at this point, Sweet!
Right Side, Aft Main Spar. Here, All 10 bolts, per side, have been installed. I needed 3 washers for each bolt. One under the head, and two under the nut. You may also notice the electrical conduit that I ran into the fuselage. The black wrap was used to help prevent chaffing of the aileron push tubes. It was removed just after this pic was taken.
I was able to torque the Right side from the nuts and the Left side from the heads.
*Note - NAS bolts have different torq settings than AN bolts.
NAS 1304 80-100 inch/lbs NAS 1307 520-630 inch/lbs AN4 Bolts 50-70 inch/lbs
Wing Bolt Notes
1- Prepare early by doing research on the VAF site, gather all the required tools, and look over plans pg. 80
2- Make sure all of the prep work is Done. (Aileron push tubes installed, fuel level sender wire hole drilled, 1/4 gap cut in front brackets(use an Air saw), rear air vent hose ready for install,etc
3-Freeze the Bolts, Make drift/alignment Pins from hardware store bolts
4- Take Your Time, Have at least 3 helpers
5- Lube the bolt shanks, drifting pins, and holes prior to install.
6-Acquire an Air Ratchet, Rivet Gun (with flush set), small Ball Peen Hammer, Box Wrenches/Sockets/Crows Feet(5/8,11/16,7/16 etc.), Various Extensions, Breaker bar, Mirror, Magnet, Grease, Rubber Gloves, Head Lamp, Drop Light,etc.
Wednesday, December 14, 2011
The Wing Tips
The wing tips have been trimmed and fitted!
(Basically, I followed Darwin Barrie's instructions in the articles section of the VAF site. Everything worked out great. Thanks Darwin!)
I have also finished installing ALL 76 #6 nutplates and all 8 reinforcement strips.

The square wooden dowels were intially set with epoxy, then backfilled and covered with fiberglass resin.
I added some West System 410 filler to the resin to thicken it up.
Foam ribs were fabricated to support the tips while drilling. (The center one is not shown)
(Basically, I followed Darwin Barrie's instructions in the articles section of the VAF site. Everything worked out great. Thanks Darwin!)
I have also finished installing ALL 76 #6 nutplates and all 8 reinforcement strips.
The square wooden dowels were intially set with epoxy, then backfilled and covered with fiberglass resin.
I added some West System 410 filler to the resin to thicken it up.
Foam ribs were fabricated to support the tips while drilling. (The center one is not shown)
*Builder Tip-I've been told that it's easiest to trim and fit the tips while the wings are in the cradle.
Tuesday, December 13, 2011
Monday, November 21, 2011
Custom Glove Box for the Fuselage
Here is my version of the fuselage IPAD/Glove Box Mod. Yes, it took some time to get everything trimmed and fitted, but I think it's worth it! I'll paint the door and finish the inside soon.
The door is attached with a piano hinge on the bottom and held closed by a flush Hartwell latch. There is a doubler that surrounds the top and sides. Pretty Slick!
Wednesday, November 09, 2011
Subscribe to:
Posts (Atom)


